AFM for Azure Ingress/Egress traffic filtering and VPN tunneling > Class 1: AFM for Azure Ingress/Egress traffic filtering and VPN tunneling Source |
Deploy BIG-IP In Azure
Note
Please note that you will incur costs associated with creating Azure resources and consuming F5 BIG-IP marketplace offers if you are using your own Azure account.
Launch BIG-IP 3nic stack
Browse to Github to access the F5 – Azure templates
- https://github.com/F5Networks/f5-azure-arm-templates/tree/master/experimental/standalone/3nic/new-stack/payg
- Scroll down and click Deploy to Azure button
You will be redirected to portal.azure.com
- Log into the azure portal when prompted
- Username : f5student#@f5custlabs.onmicrosoft.com
- Password: ChangeMe123
Complete the Customized template using the following values (replace # with your student number to avoid conflicts)
Resource Group Select Create New Resource Group f5student#-rg Location East US Admin Username azureuser Admin Password ChangeMeNow123! DNS Label f5student#bigip Instance Name f5student#-f5vm01 Number of External IPs 3 Image Name Best25Mbps BIG IP Modules ltm:nominal,afm:nominal Restricted Src Address 0.0.0.0/0 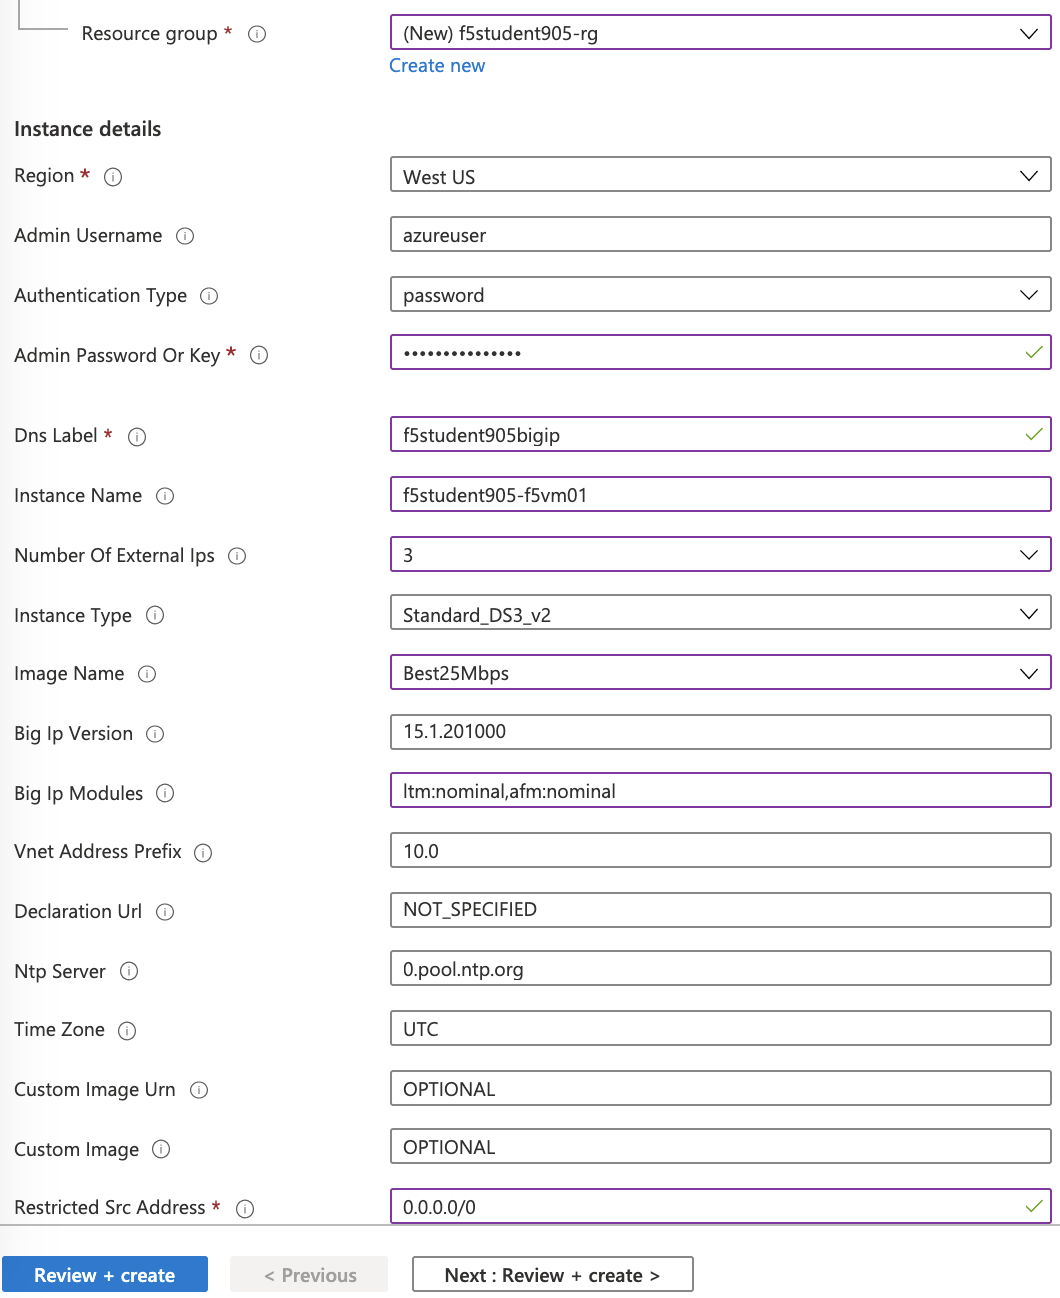
Click the “Review + Create”
Click Create after confirming entries
This will take appoximately 10 minutes
- You can monitor deployment on the azure dashboard by opening the Notifications in the azure portal
Continue with the Lab. The deployment will complete by the time the BIG-IP configuration is required
Deploy App Servers
Browse to f5student#-rg resource group in Azure portal
Deploy App1
- Click Add
- Select Ubuntu Server 18.04 LTS
- complete virtual machine template with following values
Resource Group f5student#-rg Virtual machine name f5student#-app1 Admin type Password Username azureuser Password ChangeMeNow123! Public inbound ports none 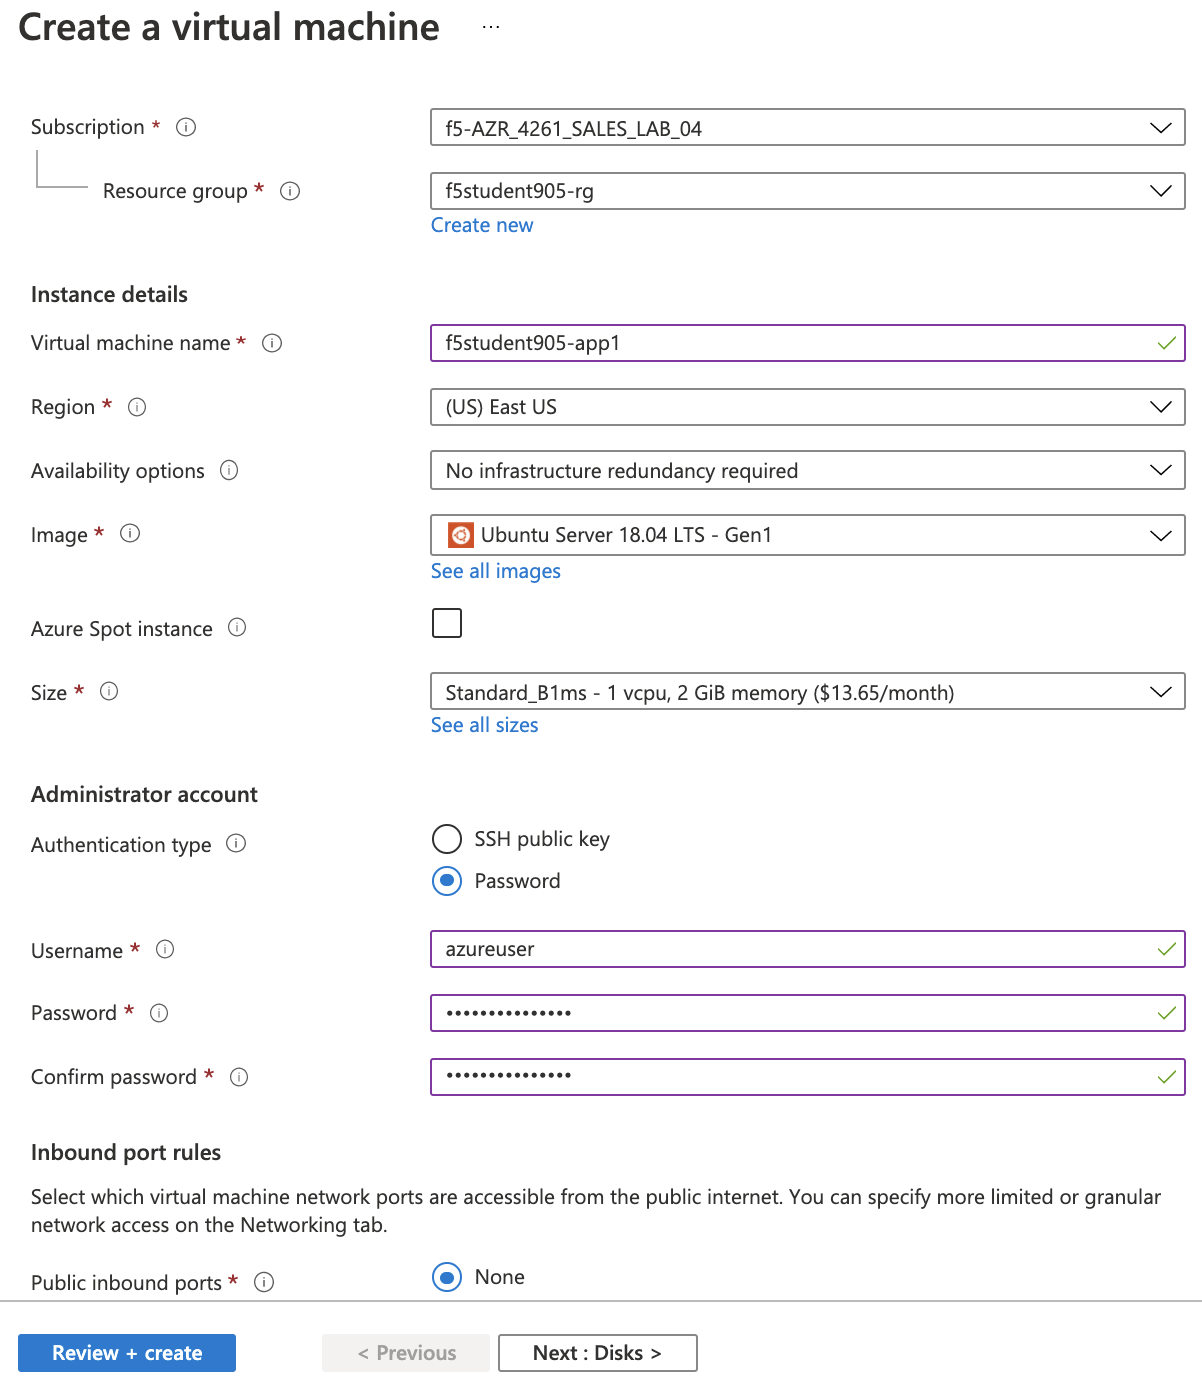
- click "Next : Disks"
OS Disk Type Standard HDD Use Managed Disk Deselected (No) Storage Account select your rg from list 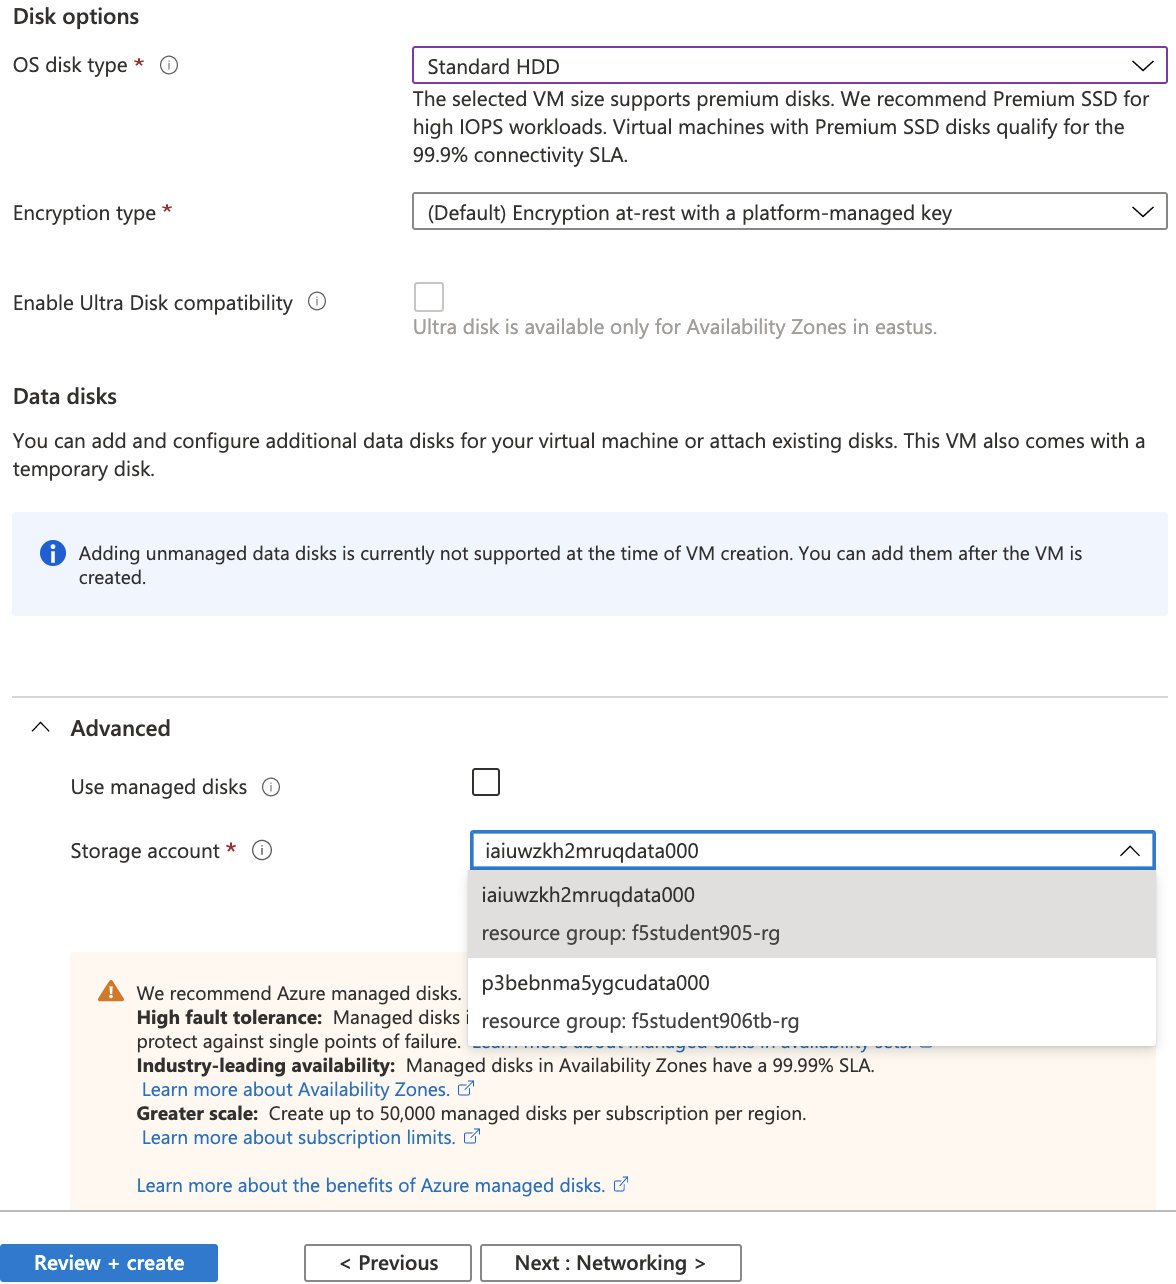
- click "Next : Networking"
Subnet internal (10.0.3.0/24) Public IP None NIC security group None 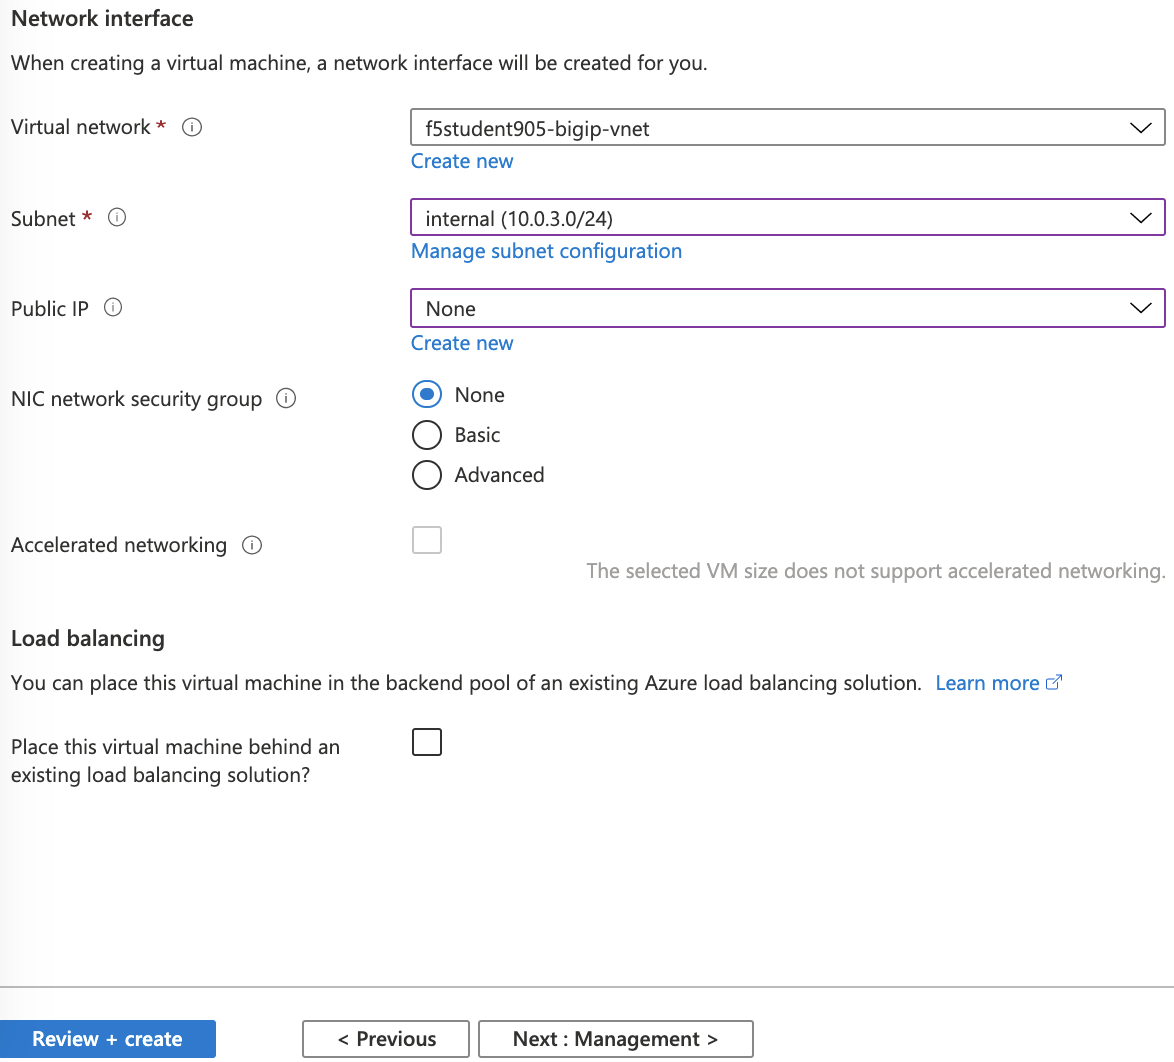
- click "Review + create"
Click Create after confirming entries
This will take appoximately 1 minute
- Continue when deployment completed
Repeat previous steps to deploy App2
- Click Add
- Select Ubuntu Server 18.04 LTS
- complete virtual machine template with following values
Resource Group f5student#-rg Virtual machine name f5student#-app2 Admin type Password Username azureuser Password ChangeMeNow123! Public inbound ports none - click "Next : Disks"
OS Disk Type Standard HDD Use Managed Disk Deselected (No) Storage Account select your rg from list - click "Next : Networking"
Subnet internal (10.0.3.0/24) Public IP None NIC security group None - click "Review + create"
Click Create after confirming entries
This will take appoximately 1 minute
- Continue when deployment completed
Review the BIG IP config
- Access the BIG-IP management GUI
- search f5student#bigip-mgmt-pip in azure portal to capture BIG-IP management public address
- browse to https://<f5student#bigip-mgmt-pip
- Username: admin
- Password: ChangeMeNow123!
- Examine system config to validate basic network config
- browse to System->Resource Provisioning to confirm AFM and LTM are provisioned
- browse to Network->Self IPs to capture external and internal nics and associated ip addresses
- browse to Network->Routes to capture default route